Blog
The Ultimate Guide to Mastering Your Next Vest Sewing Pattern

May
Are you looking to elevate your wardrobe with a chic, beginner-friendly garment that looks professional every time? Imagine slipping on a beautifully tailored vest that fits like an absolute dream, instantly upgrading your favorite everyday outfits with a touch of handmade sophistication. Creating your own clothing is an incredibly rewarding experience, and choosing the perfect Vest Sewing Pattern is the ultimate way to achieve that highly coveted boutique-quality construction at a savvy price.
Whether you are a newcomer to the craft or a seasoned pro seeking a satisfying project to finish in a single afternoon, this comprehensive guide will walk you through everything you need to know about crafting your very own essential vest. From selecting the ideal fabrics to mastering foundational sewing techniques, this article will ensure your finished garment is nothing short of a handmade masterpiece.
[Photo: A stylish woman wearing a classic pinstripe vest with a functional button-front closure, demonstrating the chic, tailored fit of the Vest Sewing Pattern.]
Why Choose a Vest Sewing Pattern for Your Next Project?
There is nothing quite like the pride of wearing a garment you stitched yourself, and a high-quality Vest Sewing Pattern makes achieving a flawless, professional finish easier and more rewarding than ever. For beginner sewists looking to branch into outerwear, a vest is an absolute dream come true. It completely removes the intimidation factor of setting in traditional sleeves or constructing complex collars.
The beauty of this particular design lies in its timeless, structured silhouette. It perfectly balances ultimate comfort with a clean, modern, and tailored aesthetic. The thoughtful, relaxed fit is specifically designed to glide smoothly over your layers without ever feeling overly bulky, ensuring you look polished from every possible angle.
Unmatched Versatility in Styling
A beautifully sewn vest is the ultimate versatile wardrobe staple that you have been waiting to create. Thanks to its modern minimalism and classic outerwear charm, you can effortlessly style it for any occasion. You might layer it over a crisp white shirt for a professional day at the office, or pair it with a cozy long-sleeve tee for a relaxed weekend brunch. The design features a versatile neckline and armhole finish, offering a sleek, high-end look whether you decide to fully line the garment or keep it unlined for a much lighter, seasonal feel. It is exactly the kind of stylish project that will have people stopping you in the street to ask where you bought it.
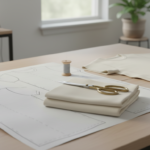
[Photo: A flat lay of a printed Vest Sewing Pattern surrounded by essential supplies like a seam ripper, bias tape, three matching buttons, and a pair of fabric scissors.]
Selecting the Perfect Fabric for Your Vest Sewing Pattern
Choosing the right fabric is one of the most exciting steps in bringing your Vest Sewing Pattern to life. Your fabric choice will completely dictate the final drape, warmth, and aesthetic of your garment. The recommended fabrics for this project include medium to heavyweight options such as cotton, silk, wool, linen, synthetics or blends, brocade, velvet, corduroy, canvas, pique, and velveteen.
Here are a few expert suggestions to help you achieve your desired look:
- For a Structured, Crisp Look: We highly recommend using a medium-weight wool or a wool-blend coating. This type of fabric holds the shape of the vest beautifully and provides excellent, cozy warmth for cooler days.
- For a Casual, Everyday Aesthetic: If you prefer something more lightweight and relaxed, opt for a sturdy cotton twill or denim. These materials offer a rugged charm that only softens and improves with every single wash.
- For a Touch of Luxury: Consider a heavyweight linen. Not only is linen remarkably easy to sew, but it also provides a stunning, textured drape that is absolutely perfect for transitional weather and layering.
Essential Notions and Supplies
Beyond your primary fabric, you will need to gather a few essential supplies before you begin sewing. Your shopping list should include:
- Buttons: You will need exactly 3 buttons for the functional button-front closure.
- Interfacing: Fusible interfacing is required to give structure to the front and back neck facings.
- Bias Tape: You will need 1.65 yards (1.5 meters) of ready-made bias tape in a corresponding color to finish the armholes. However, if you plan to finish both the bottom edge and the facing with binding, you will need 4.4 yards (4 meters) of bias tape.
[Photo: A close-up shot of hands pressing a medium-weight wool fabric with an iron, demonstrating the importance of pressing seams during garment construction.]
What’s Included in Your Digital PDF Download
In today’s modern sewing landscape, digital patterns offer ultimate convenience. When you purchase this Vest Sewing Pattern, you are investing in a modern, instant-download PDF designed for calm, confident sewing. Because it is a digital product, no physical product is shipped, meaning you get instant gratification and can start sewing immediately.
Your comprehensive digital package includes:
- Home Printing Options: A4 and US Letter PDF files that are expertly optimized for easy, seamless printing right on your home printer. You simply print and assemble the pages before cutting your fabric.
- Copy-Shop Options: An A0 Copy-shop PDF file if you prefer large-format printing at your local print shop.
- Layered PDF Format: This incredible feature allows you to toggle your specific size on or off before printing, which helps avoid visual clutter and saves precious printer ink.
- Step-by-Step Guidance: Comprehensive sewing instructions filled with clear, high-quality illustrations to expertly guide your progress, ensuring jargon-free, manageable steps.
Inclusive Sizing for Every Body
A truly great Vest Sewing Pattern must celebrate and fit all body types with absolute confidence. This pattern features inclusive sizing that has been graded with meticulous care, ranging from XS all the way to 5XL.
To ensure the perfect fit every single time, rely on the detailed measurement chart. For example, the pattern accommodates a bust size starting at 34.3 inches (87 cm) for an XS, up to 48 inches (122 cm) for an XXXL, with corresponding waist and hip measurements clearly laid out in both inches and centimeters. The finished garment length ranges from 19.3 inches (49.0 cm) for size XS, up to 22.5 inches (57.2 cm) for size XXL.
[Photo: A graphic illustration showing a size measurement chart featuring Bust, Waist, and Hip measurements, along with a reminder that a 1cm seam allowance is included.]
Essential Sewing Tips Before You Begin
Before cutting into your beautiful fabric, it is important to review a few golden rules of garment construction. These tips will ensure your Vest Sewing Pattern results in boutique-quality construction:
- Practice on Scraps First: Before starting your main project, practice your straight stitch and techniques on small scraps of your chosen material to ensure your machine’s tension is correct.
- Press Your Seams: Using an iron to press your seams is a crucial step in the sewing process. It sets the stitches into the fabric and gives your final vest a highly professional, polished look.
- Lock Your Stitches: All sewists should get into the habit of backstitching. Always reverse sew at the very beginning and the end of each seam to securely lock your stitches in place.
- Embrace the Seam Ripper: Sewing can be tiring, so ensure you have a comfortable workspace with excellent lighting, and take breaks to rest your hands and eyes. If you make a mistake, do not panic! A seam ripper is specifically designed to safely remove stitches without damaging your lovely fabric.
Key Construction Steps for Your Vest Sewing Pattern
While the pattern download provides a fully illustrated guide, here is an exclusive sneak peek into the key construction steps that make this Vest Sewing Pattern such a joy to sew. Note that a seam allowance of 1 cm (0.4 inches) is already included in the pattern pieces.
1. Preparing the Facings and Central Seams
You will begin by ironing the fusible interfacing to the wrong side of the front and back neck facings. Next, match the front and back neck facings with right sides together, sew the shoulder seams, and press the seam allowance open. You will also sew the central seam of the back details; if your fabric is thick, overcast the edges separately and press them open, but if it is thin, overcast them together and press to the left.
2. Crafting the Perfect Neckline
Match the facing with the neckline, right sides together, align the shoulder seams, and sew. To ensure the neckline turns beautifully, make small cuts along the whole seam allowance without actually reaching the stitch line. Then, flip the facing and make a crucial topstitch at 2mm from the seam. This step sews the seam allowance directly to the facing, ensuring the facing remains completely hidden when the vest is worn.
3. Assembling the Bodice and Side Seams
Match the front A and B details (right sides together) to sew the bust seam, and do the same for the back A and B details for the side-back seam. Finally, match the assembled front and back pieces at the side seams. Overcast these edges to prevent fraying and press them carefully.
4. Finishing with Bias Tape
This pattern uses elegant bias tape finishing for clean edges. Fold your ready-made bias tape by the middle and press it. Insert the armhole edges into the binding and sew. Once attached, turn the binding to the wrong side of the armhole and stitch it to the fabric for a flawless, hidden finish. You can repeat a similar bias tape method for the bottom edge, or simply fold the bottom edge up and stitch it down depending on your preference.
5. The Final Touches
The final step in your Vest Sewing Pattern journey is adding the closures. Carefully create your buttonholes and sew your 3 buttons onto the front placket. Give the entire garment a thorough steam, and your beautiful, handmade vest is officially ready to wear!
Frequently Asked Questions
To ensure you have everything you need before starting, here are a few quick answers to common questions about this project:
- Are seam allowances included? Yes, the pattern includes a 1 cm (0.4 inches) seam allowance.
- Is this a physical paper pattern? No, Patternslabco provides digital PDF patterns only; no physical product is shipped to you.
- What skill level is required? This pattern is heavily geared toward beginners and features jargon-free instructions broken down into simple, manageable steps.
Ready to Start Stitching?
Sewing your own outerwear is an incredible milestone, and this Vest Sewing Pattern is expertly designed to guarantee your success. From the budget-friendly luxury of creating designer-quality pieces for a fraction of the cost, to the sheer instant gratification of downloading your files immediately, there has never been a better time to start.
Ready to start your next favorite sewing project? Grab your fabric, print your detailed layered PDF pattern, and begin stitching a timeless piece that you will proudly reach for season after beautiful season. Let’s get sewing today!
“`